Components
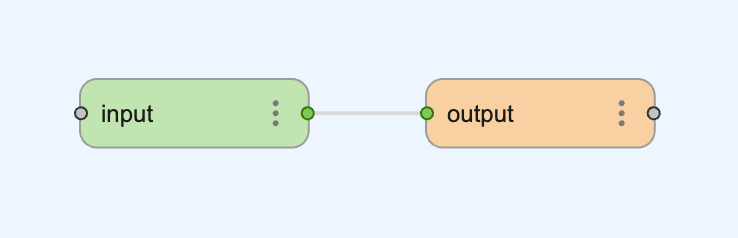
Components are key to Breadboard. We create components, configure them, name them, and wire them together to create our boards. By default a blank board contains two components: an input and an output, with the input pre-wired to the output.
Note
For more about the input and output components, take a look at our Built-in Kit reference documentation.
Adding and Removing Components
Adding a Component
To add a component to our board we drag it from the component selector found in the bottom left corner of the Visual Editor.

The selector has two main sections. On the left is a button, named Components, which shows the entire collection of kits and the components they contain when clicked. On the right is a selection of shortcuts to commonly-used components from our Agent Kit.
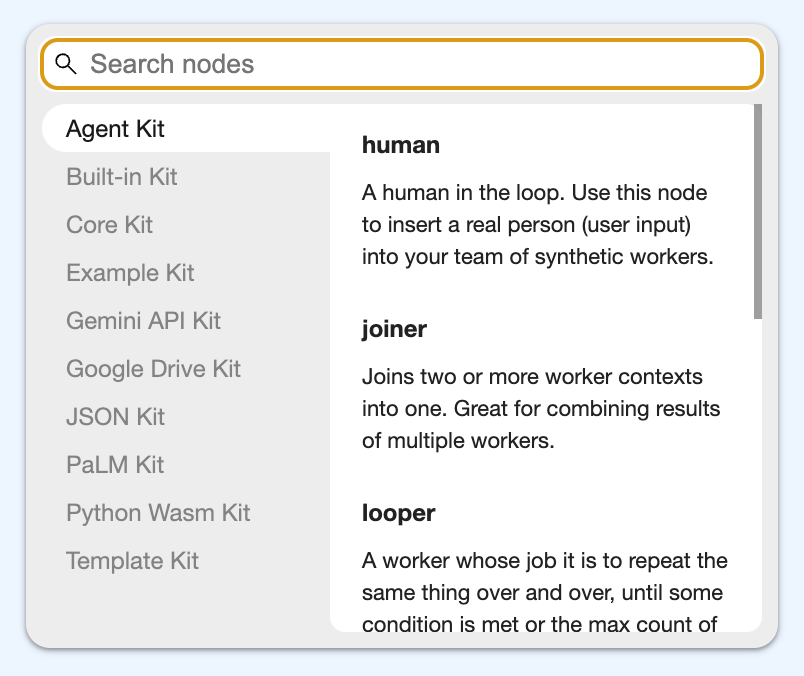
In the component select we can search for a particular component we're interested in, as well as see short descriptions of what each component offers.
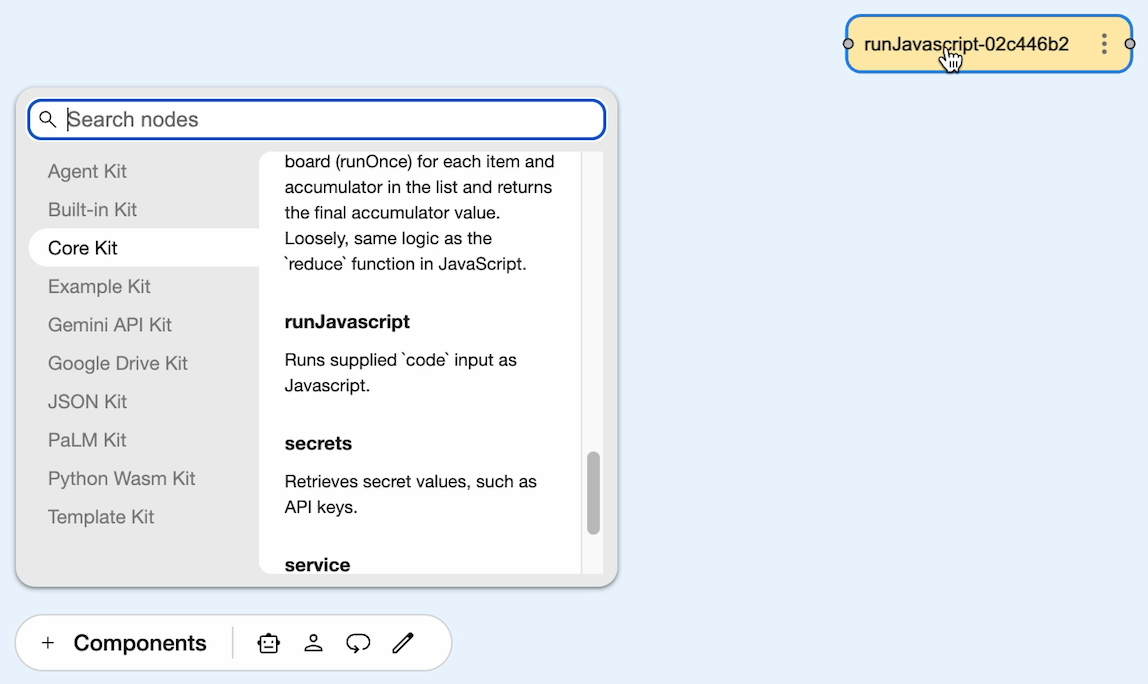
We can add the component to the board by dragging it from the list into the main area of the Visual Editor.
Removing a Component
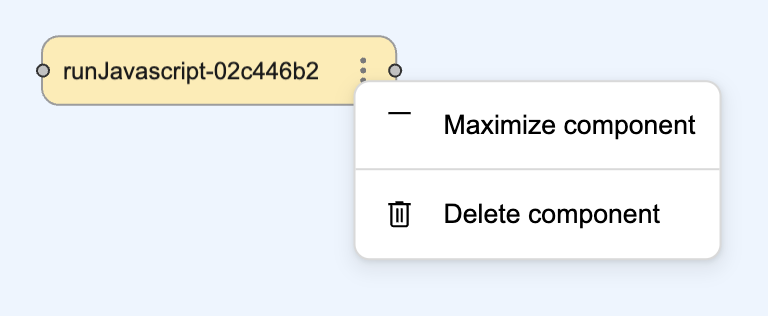
To remove a component either click on it and press the delete key (or Backspace) on the keyboard, or click on the three dots to the right of the component and choose Delete component in the overflow menu.
Tip
If you accidentally remove a component or wire you can bring it back by using the undo option in the top navigation bar, or by pressing Cmd/Ctrl + Z on your keyboard.
Updating Component Information
We can also update the title, log level, and description of the component using the Component details section in the right hand pane.
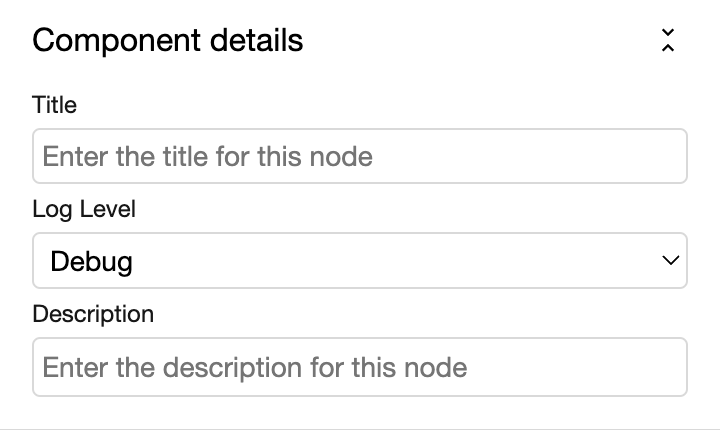
The title is shown in the Activity Panel when a board is run, and the log level determines if the component's output is shown in the Activity Panel only, or if it should be shown in the Preview as well.
- If the log level is set to Debug it will show only in the Activity Panel.
- If the log level is set to Information it will be shown in the Activity Panel and the Preview.
Note
We do not currently use the component description within the Visual Editor UI, but this may change in the future.
Changing a Component's Inputs
Most components can be configured in some way. When we select a component in the Visual Editor its configuration options are shown in the right hand pane in the Input section just below the Component details. The exact options depend on the component itself, but as one example the inputs for the runJavascript component are shown below.
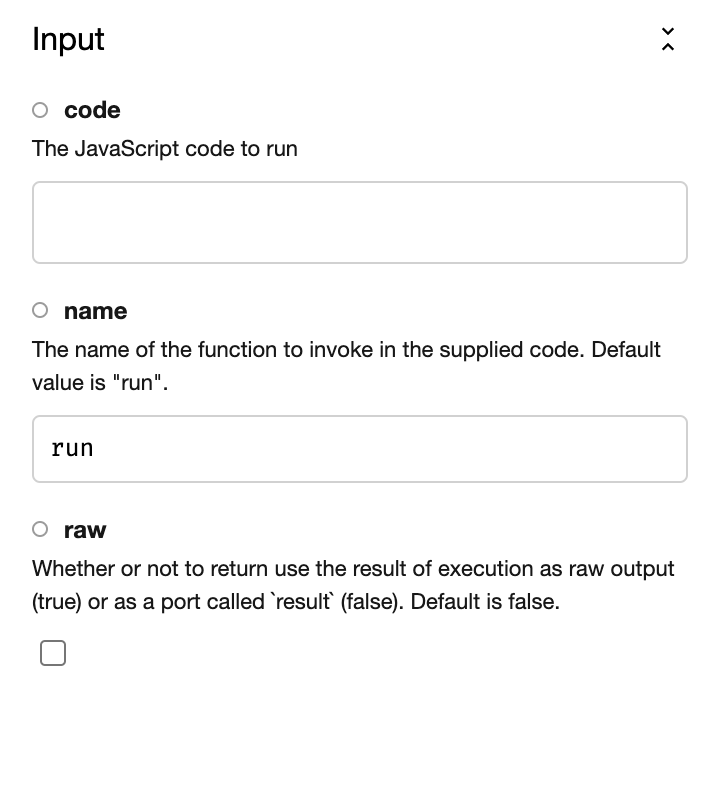
In the case of this particular component – the runJavascript one – we see:
- code The code we wish to run when the component is reached in a board run.
- name The name of the function to invoke from the
codeinput set above. - raw Whether or not the output of the component should be used as-is, or whether it should be wrapped in a port called
result.
Note
For more information on what ports are, take a look at our reference on Inputs and Outputs.
Each component is different, however, and the description of what each port does can be found just below its name in the component's Input section.
Setting input and output schemas
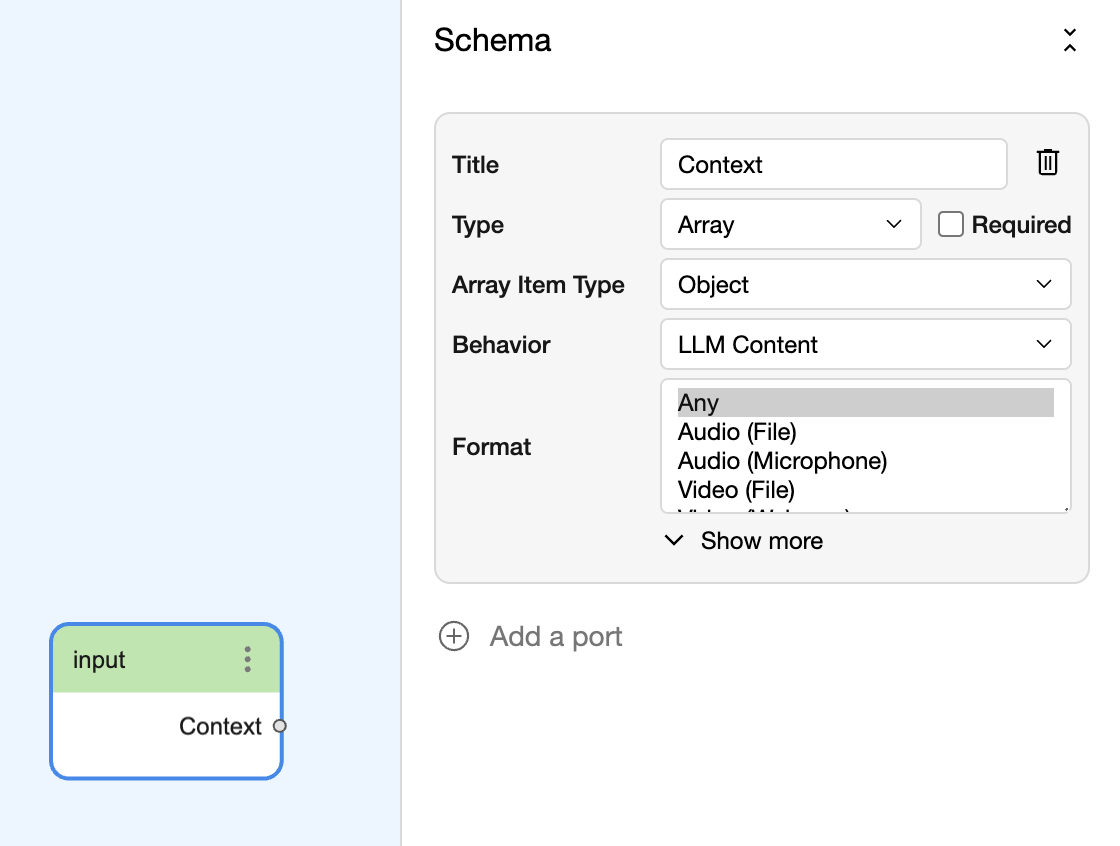
Input and Output components stand slightly apart from other components in that they have a single schema port which, when changed, adds or removes other ports on the component itself.
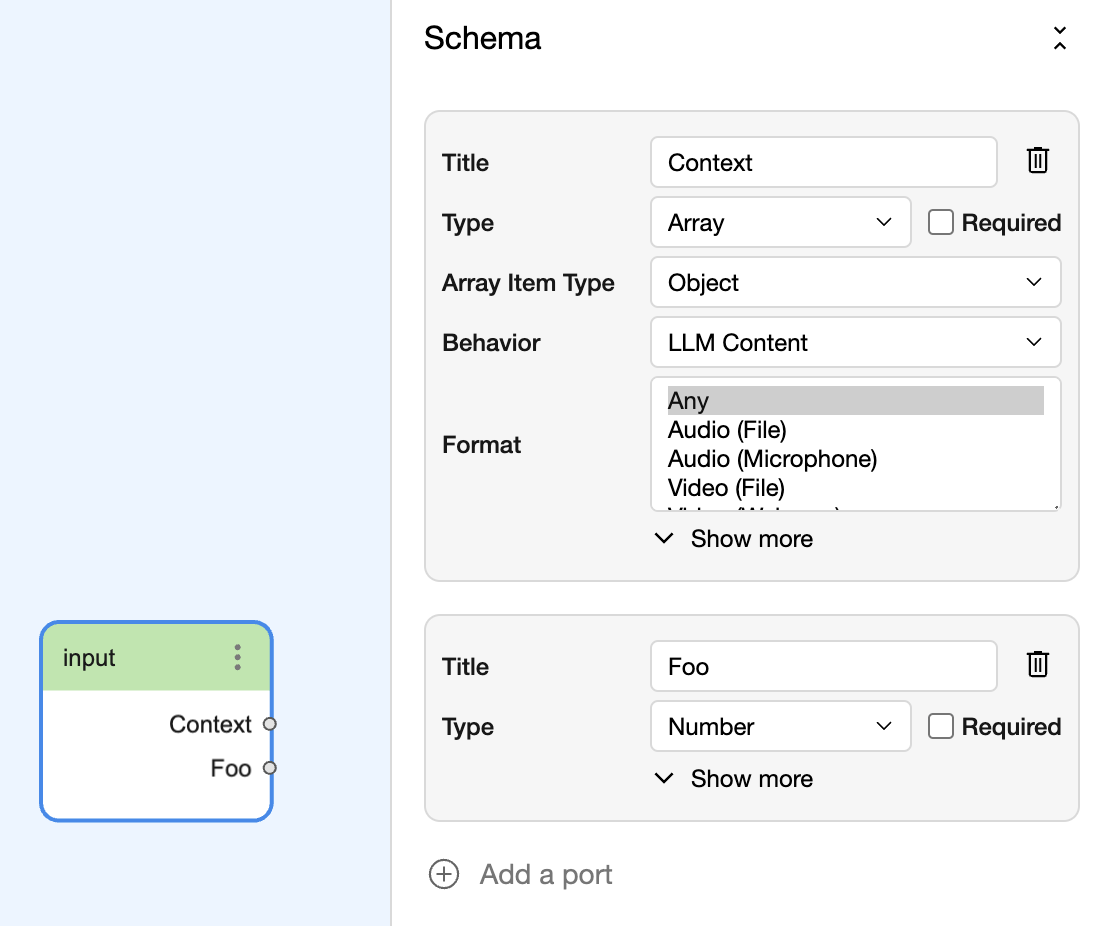
For example, our input component starts like this.
Tip
By default components are "collapsed", showing only a single input and output port. By double clicking on their name (or using the component's overflow menu) you can expand them to see all the ports they contain.
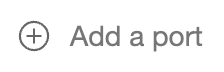
Suppose, however, we wanted to add an extra output port from our input component, such that alongside Context it has a number port called Foo. We can this by clicking the Add a port button in the Schema section of the right hand pane.
Note
There are quite a few options for types supported within a port's schema. A very common one is LLM Content, which aligns with the Gemini API Content type and which is used in the components like the Agent Kit's Specialist. The types we choose affect the inputs that are shown within the Activity Pane when a board is running.
We can then change the title and type of our new port to be Foo and Number, respectively. After that we should see that the input component now has an additional port we can use called Foo.
Note
Input and output components are not the only "shapeshifters" in Breadboard. The Template Kit includes other components that use an input string to derive their additional ports.
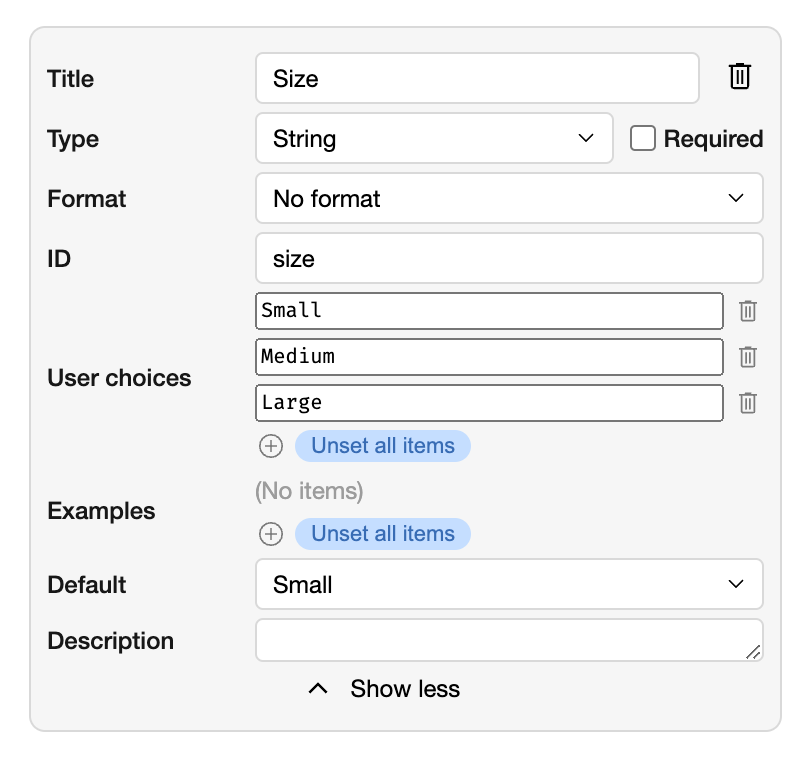
There are also "extended" properties available to us within the schema editor, some of which change depending on the overarching type of the port. For example, if the port type is a string we can set a list of acceptable values from which the user may choose.
Wiring Components Together
Adding wires
To wire two components together we click drag from the output port of one component to the input port of another component.
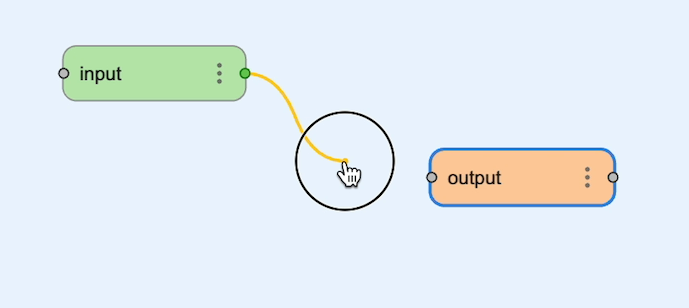
Depending on the component we can also wire an output port to one of its own input ports, too, thereby creating a loop.
Note
We are currently working on limiting the ports that can be connected based on their types. Until that feature lands, however, it is important to check that ports are of a compatible type.
Removing wires
To remove a wire, click on it and press the delete key (or Backspace) on the keyboard.
Dynamic wires
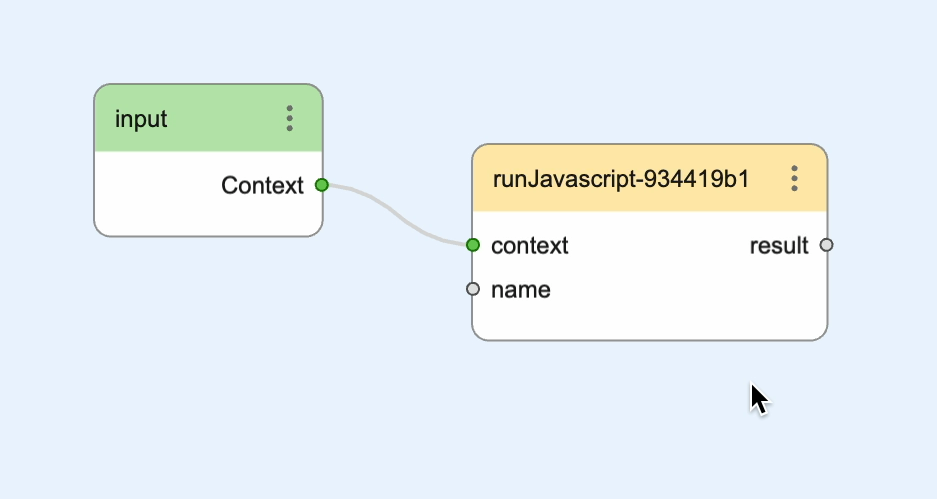
In some cases the ports on a component are not fixed, and we can create a wire by dragging from a port to the target component. For example, the runJavascript component supports the addition of dynamic wires as inputs.
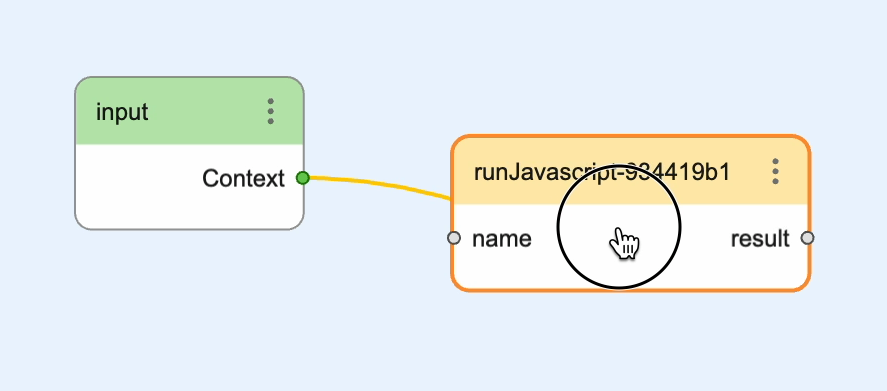
When we release the cursor we will be prompted to name the port on the target component.
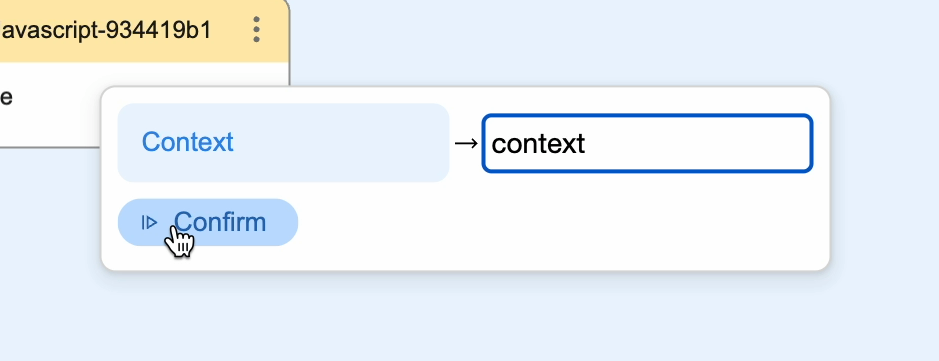
After which we see that is now a new port on the runJavascript called, in this case at least, context. We can then access this port like any other within the component.
Note
If we delete a dynamic wire the port that was created to service the port is also removed.