Building a Librarian with the Agent Kit
At the end of this guide, we will have a simple agent that helps us find interesting books. Given a topic, the agent will chat with us a little bit, trying to get a few more details on what exactly we're looking for in a book, then use the Google Books API to find some choices, and finally present them to us in a nice outline.
Tip
If this is your first time playing with Breadboard, this guide is a good starting point. It is intentionally a bit more verbose, written with the hope that a Breadboard novice can go through it and get a good sense of how to build boards.
The finished board is just below and you're welcome to play with it first. When you run it for the first time, it will ask you for the Gemini API Key. If you don't have one yet, you can get a key at https://aistudio.google.com/app/apikey.
Note
You might have a reasonable question: "Why does Breadboard ask me for an API key?" One of the key tenets of this project is to allow makers quickly connect to various interesting models and other APIs. To do that, Breadboard has a pretty robust system for managing secrets: valuable pieces of data help you connect to them. To balance convenience with flexibility, Breadboard Visual Editor stores these keys in your local browser store.
This board uses the Agent Kit, a collection of components designed to help build asynchronous, semi-autonomous agents. You can read more about it in the Agent Kit Reference. Additionally, we'll use the built-in "input" and "output" components. These are described in the Built-in Kit Reference.
To build this board, we will use the Breadboard Visual Editor, which is a tool for rapid prototyping AI systems. You can learn more about about all the different features and capabilities of Breadboard Visual Editor in the Visual Editor Reference.
Tip
At any point in the tutorial, you can click "See in Visual Editor" link at the left bottom corner of the board diagram. This will open the Breadboard Visual Editor and load the board. So if you're not feeling like typing and doing all the dragging and dropping of components, you can just follow along by opening each link.
Step 1: Create a Blank board
First, we'll create a blank board. Let's name it something like my-librarian.bgl.json and give it a proper title and description, like "My Librarian" and "A simple agent that helps me find interesting books".
Step 2: Add Summarizer
As our next step, let's add a Summarizer Specialist to this board. The easiest way to do this is by grabbing the little robot icon on the bottom left corner and dragging it onto the board.

Now, let's remove the existing edge connecting the input and output components. We can do this by clicking on the edge to highlight it and then pressing "Delete" (or "Backspace" for non-Mac users).
With the old edge deleted, let's connect input and output to the Specialist. Click and drag from the input's "Context" port to the Specialist's "Context In" port and then from the Specialist's "Context Out" port to the output's "Context" port.
We will not invest a tiny bit of effort to educate our Specialist and imbue it with purpose.
Note
With Visual Breadboard, it's super-easy to create and connect Specialists. We wanted to make sure that you can focus on the most interesting -- and challenging! -- part: teaching Specialists to do their work well.
We'll start with naming it appropriately. Click on the component representing the Specialist and in the left (or bottom, if your Breadboard editor window portrait-shaped) panel, click on "Component Details". Then Type in "Summarizer" as the component's title. You will also see that the title changes in the visual editor as well.
Moving on to the Persona, let's type in something like this:
You are an expert librarian. Given any topic,
you can come up with a list of book recommendations.
As a Task, let's put:
Come up with a list of 5-7 recommendations.
Reply in markdown.
Let's give our simple board a whirl.
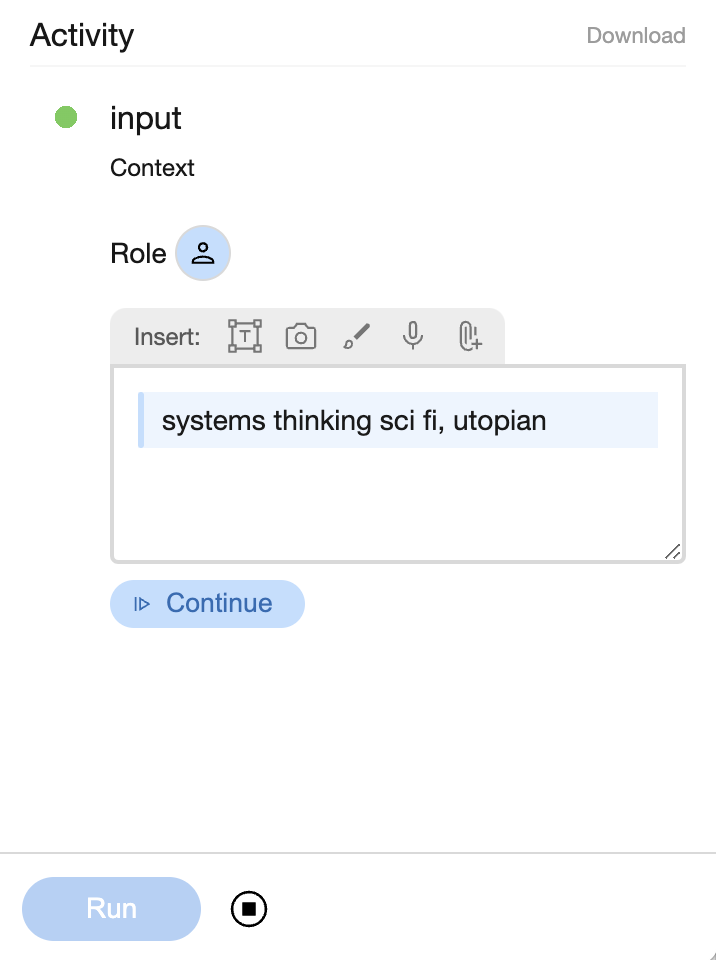
To start the board, open it in Visual Editor and click "Run" in the Activity panel. The Activity panel will show the progress of the board's run, and the first thing we'll see is the request for input. This is exactly what we would expect, since the first component in the board is the "input". Let's type some subject that we're interested in. I love systems thinking and utopian sci fi, so that's what I'll enter.
After entering the text, click the "Continue" button. This will result in a flurry of activity in the Activity panel, and after a few seconds, the board will deliver our first output.
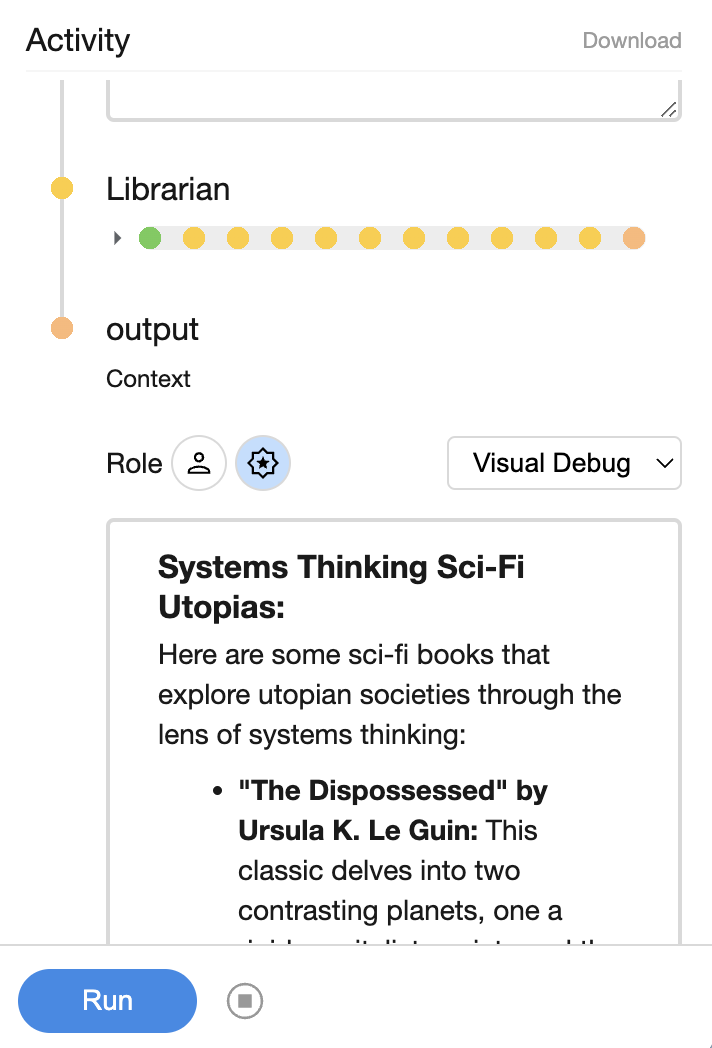
Cool! We made a Librarian board. High fives all around. The results are good and the choices are classic.
Except...
After running this board with a few different inputs (it's easy -- just click "Run" again), we notice that the book recommendations are kind of meh. True, they are good books, but for an avid reader such as myself, it looks as if the board just cycles through "the usual suspects".
And that's understandable. Our current design relies on the Gemini's (the large language model that is behind the Specialist) parametric knowledge, and as such, is unlikely to produce fresh results or dig up forgotten gems for us.
To do that, we need to improve on our board design.
Step 3: Add Researcher
Let's add another Specialist. We will name this Specialist the "Researcher" and give it a Persona of:
You are a library researcher. Based on the provided topic,
formulate the query to call the Google Books API
to search for the right book for the user.
To get better results, we will give this Specialist the ability to call Google Books API.
To do so, click on "Create array" button under Tools, then select "Custom URL" from the dropdown and paste this URL into the box that pops up under the dropdown menu:
https://breadboard-ai.github.io/breadboard/static/boards/librarian/tool-google-books.bgl.jsonThis particular board will call the Google Books API with a specified query and return a bunch of results.
Note
Because boards are stored in the BGL format (which is just JSON), they are very easy to share and refer to. Just publish their BGL and give it a stable URL.
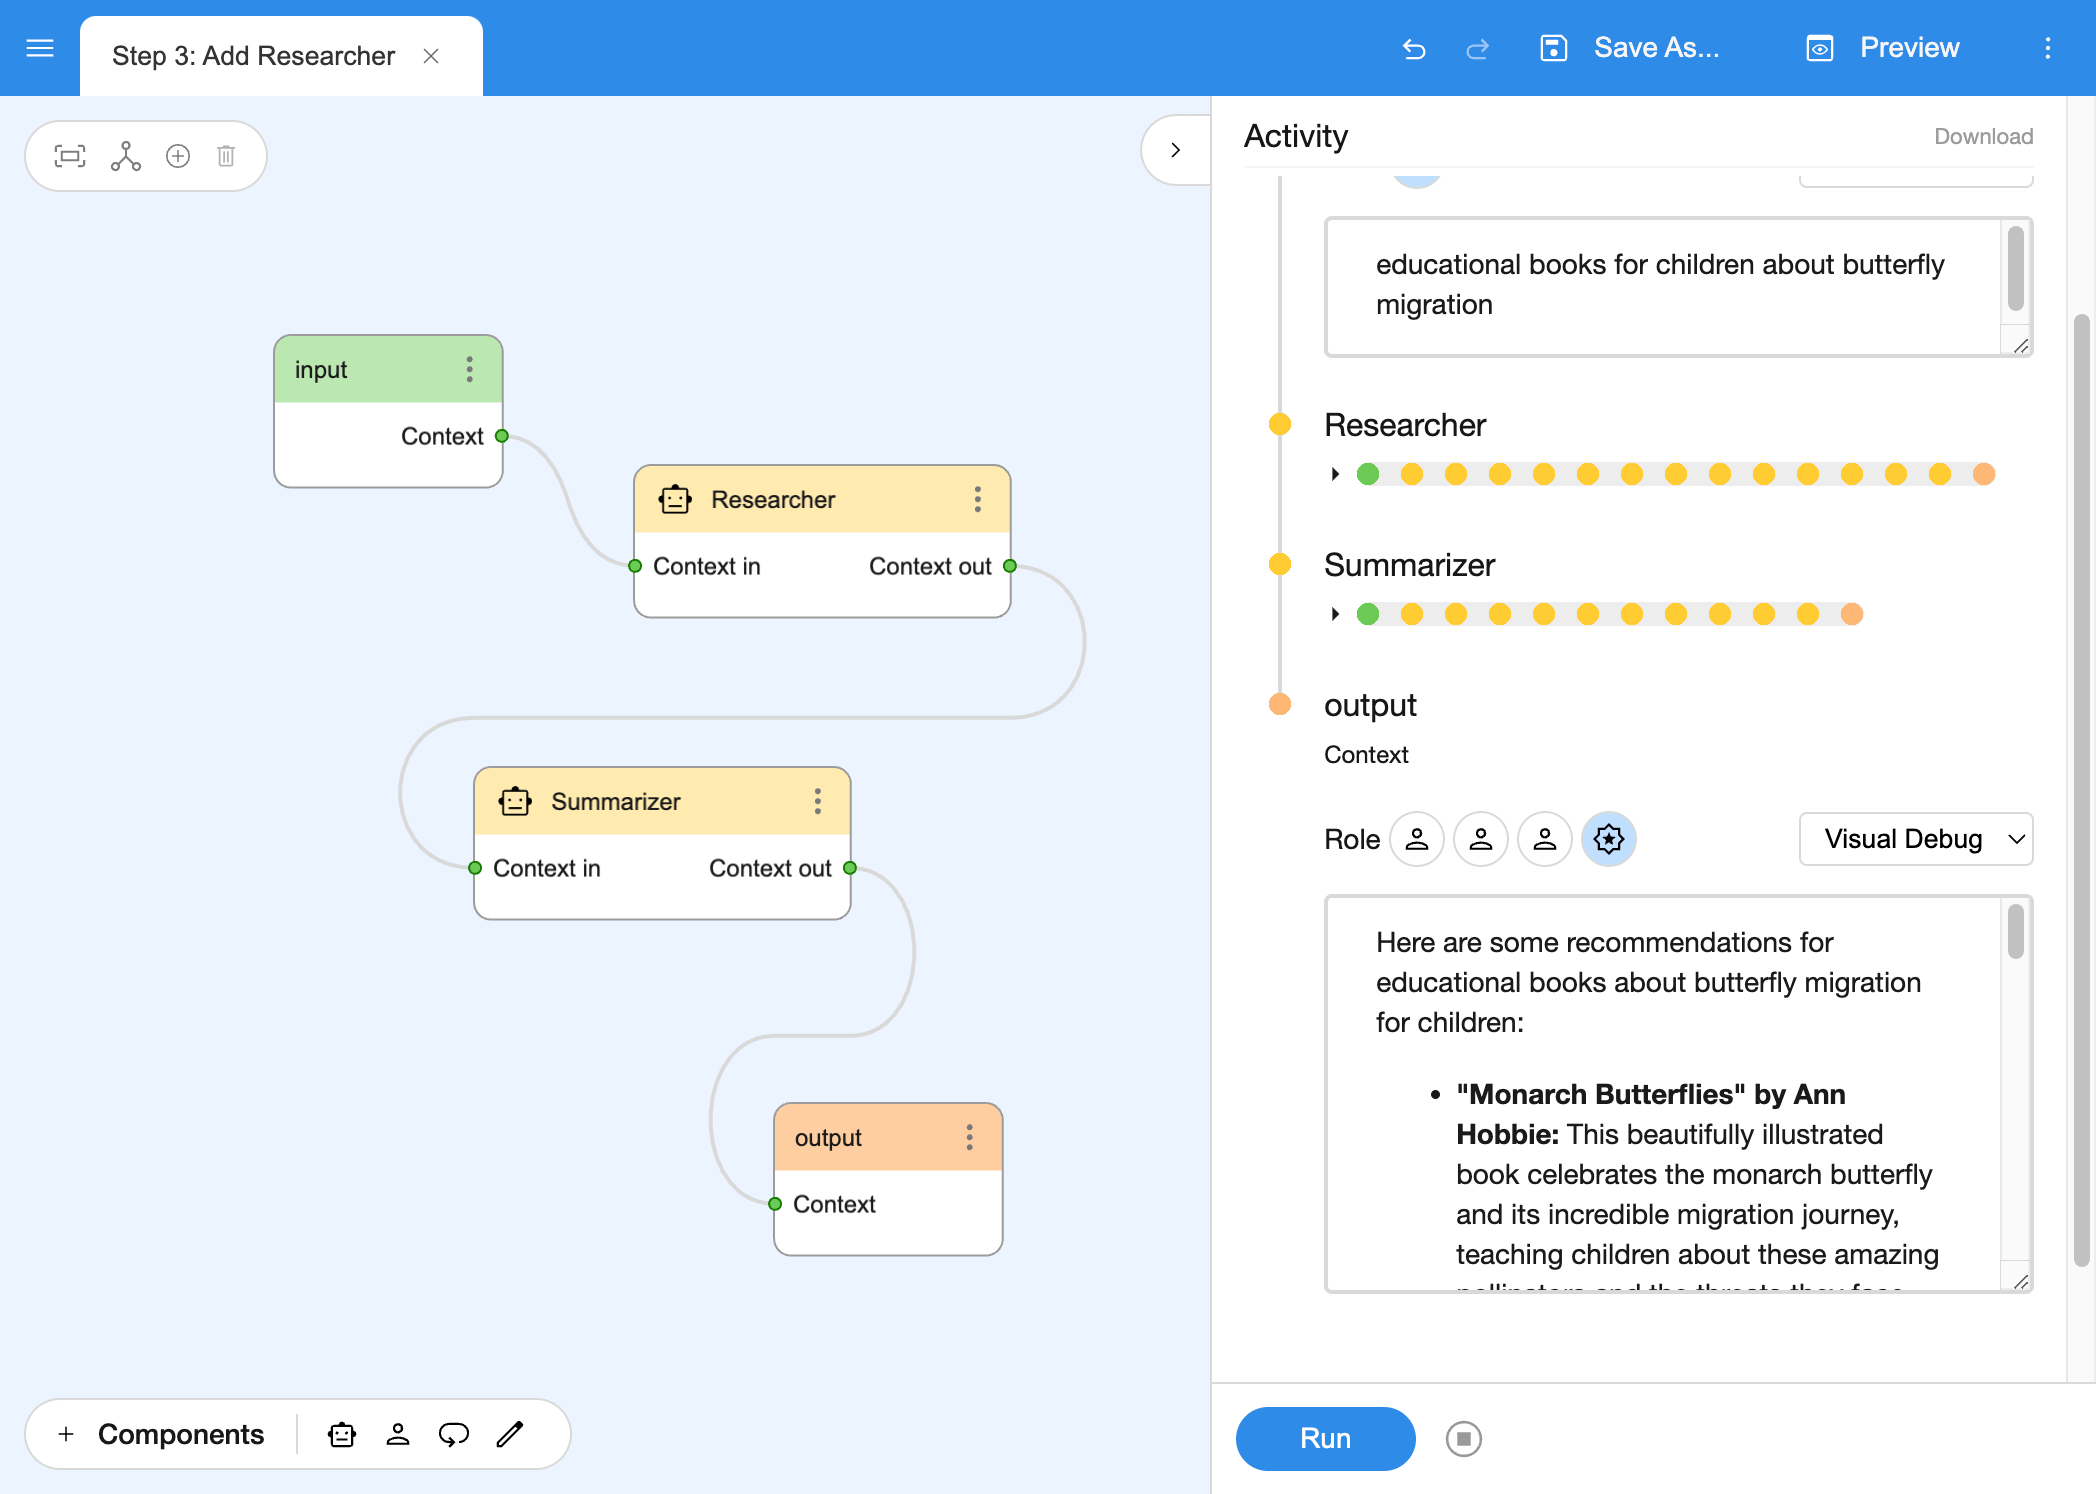
Now, let's wire them up. Delete the wire connecting the input to Librarian, and instead connect the input to the Researcher, and then wire Researcher to the Librarian. We just built our first workflow.
Both Specialists do only one task, and pass their work results along.
Speaking of which -- let's also teach the Librarian to look over the Researcher's work and consider it when providing recommendations. To do that, we'll tweak the Librarian's Persona as follows:
You are an expert librarian. Given any topic,
and the raw book search results,
you can come up with a list of book recommendations.
If we try to run this board now, we'll find that it gives much more interesting results. It does particularly well with narrow or unusual topics. For instance, here's a result of running with the query of "educational books for children about butterfly migration". Where the lone Librarian would fall back onto "The Very Hungry Caterpillar" or hallucinate book titles, working together with Researcher, it produces genuinely useful results.
This is what makes Specialists so powerful. By themselves, they are pretty good, single mindedly focused on their particular task. When organized together and armed with tools, they become a helpful agent.
Step 4: Add Interview Planner
What we have is pretty good, but I feel like it's missing something. Often, I don't actually know exactly what I am looking for, and it sure would be helpful to have my Librarian ask me a few questions around the topic of my interest to really hone in on the right book.
Let's add a brief interview process in front of the Researcher, and then give the interview results to it.
To do this, we will need to create a loop in our board: a cycle in which the interviewer repeatedly asks us a series of questions. This loop is a very common pattern when working with the Agent Kit, and it has a special component called Looper to make loops quickly.
Looper has a distinctive "cycle" icon. Just like we did with the Specialists, let's drag a Looper into the board and name it "Interview Planner". The purpose of this particular Looper will be to plan and conduct the book interview described above.
First thing we'll notice is that, unlike Specialist, Looper has two output ports. The "Context Out" port sends the conversation context when the Looper completed all of the steps of its plan. The "Loop" port sends the context repeatedly for each step of the plan.
Second difference will become evident when we click on the Looper to configure it. It has no Persona configuration field. Instead, there's only Task. This is because the Persona of the Looper is pre-defined, honed to create robust plans based on the tasks we give it. There's also no Tools configuration field. Looper is very focused on planning and the management of the plan. It has no time for tools.
For our Interview Planner's Task, let's give it something like:
Based on the initial topic, come up with the themes for
a 3-5 question interview to collect just enough information
to look for an interesting book in the library.
Then, let's wire it into the graph: insert it between the Input component and the Researcher component, the same way we wired the Researcher earlier.
Step 5: Add Interviewer
Now that we have a Interview Planner to come up with an interview plan, we will add the Interviewer to the board. The Interviewer will be responsible for formulating the questions for the interview and reacting to user feedback. This is the job for -- you guessed it -- Specialist!
Drag in another Specialist and name it "Interviewer". Here's the Persona for our Interviewer:
You are an expert researcher, whose job it is to
interview the user to collect information about
the kind of book they want. Based on the theme
provided and incorporating the history of the interview
so far, offer a question that allows the user to
easily pick or quickly type an answer.
We don't need to put anything into Task -- let's let the Interview Planner provide it. To do that, wire the "Loop" port of the Interview Planner into the "Context in" port of our Interviewer.
Step 6: Put Human in the loop
As our final component in this board, let's add Human. This component represents the user in the overall flow of the board.
Human component serves as a way to yield control back to the user of the board. When Breadboard encounters it, it pauses execution, shows intermediate results to the user, and asks the user to react to them. This is exactly what we need in our interview: show the question and wait for the user to answer it.
We'll name this component "Interviewee" and wire the "Context out" port of the Interviewer to its "Context in" port, and then close the loop by wiring Interviewee's "Context out" back into Interview Planner's "Context in".
Now that we have results of the interview coming into Researcher and Librarian, let's make sure they are aware of what's happening. We'll tweak both Researcher and Summarizer persona to add an extra lines about information collected during the interview to the Persona.
The Researcher's Persona will now look like this:
You are a library researcher. Based on the provided topic,
and the information collected during the interview,
formulate the query to call the Google Books API
to search for the right book for the user.
The Summarizer's Persona will now look like this.
You are an expert librarian. Given any topic,
the information collected during the interview and
the raw book search results,
you can come up with a list of book recommendations.
When we run this board, we'll see that its behavior has changed: instead of asking us just one question at the start, it keeps chatting with us, helping us zero in on the kind of book we're looking for -- and produces even more interesting results than before.
Note
This particular combination of Interview Planner / Interviewer / Interviewee is an AI pattern: it's a fairly reliable method to conduct a quick interview for any purpose. For instance, shown below another board, which chats with the user about a book idea and then creates a detailed outline from it. AI Patterns are the whole point and spirit of Breadboard: to give you space to joyfully uncover interesting AI patterns, as well as reuse, and remix existing ones.
Step 7: Put on finishing touches
Having built the basic structure, we can now apply a little bit of polish to make our Librarian even more effective.
One thing we can do is give the Summarizer a bit more data to work on. Instead of calling the Google Books API once, let's change the Researcher to call the API a few times. Thankfully, Specialist knows how to do that -- we just need to tell it to do so.
The new Researcher Persona:
You are a library researcher. Based on the provided topic,
and the information collected during the interview,
formulate the queries (more than one if necessary)
and call (in parallel) Google Books API
to search for the right book for the user.
Now that we've taught the Researcher that it can do parallel calls, let's make it more concrete by specifying how many calls to make in its Task:
Make up to three parallel tool calls to Google Books API
using different unique phrases to get the best results.
Tip
There are two interesting patterns in here: first is the idea of calling an API with different queries based on the same topic. It's a bit like throwing semantic darts 🎯 -- it results in more variety of the outputs, and thus more interesting data for the subsequent Specialist to work with.
The second pattern is the separation of the task and the persona. As we know from how Specialist works, the Persona is part of the LLM system instruction, while the Task shows up in the conversation context. Putting how many times and which API we called is a neat trick to inform the next Specialist about what this whole bunch of raw data is about and where it came from.
Next, let's spruce up the output just a tiny bit. LLMs are pretty good at creating Markdown and in the Google Search API JSON output, we have useful properties. It also just so happens that LLMs are pretty good at reading JSON. Let's see if we can make it translate JSON to markdown.
Looking over a Google Search API JSON output, we spot two interesting fields:
-
the
smallThumbnailgives us a picture of the book's cover, and -
the
canonicalVolumeLinkgives us the link to the book.
All we need to do is tell Summarizer to start using them. Like so:
Come up with a list of 5-7 recommendations.
Reply in markdown, making book titles hyperlinks
to the book's canonicalVolumeLink and
use smallThumbnail to display the book's thumbnail.
When we run our board, we'll see that it now shows links to the books and their covers!
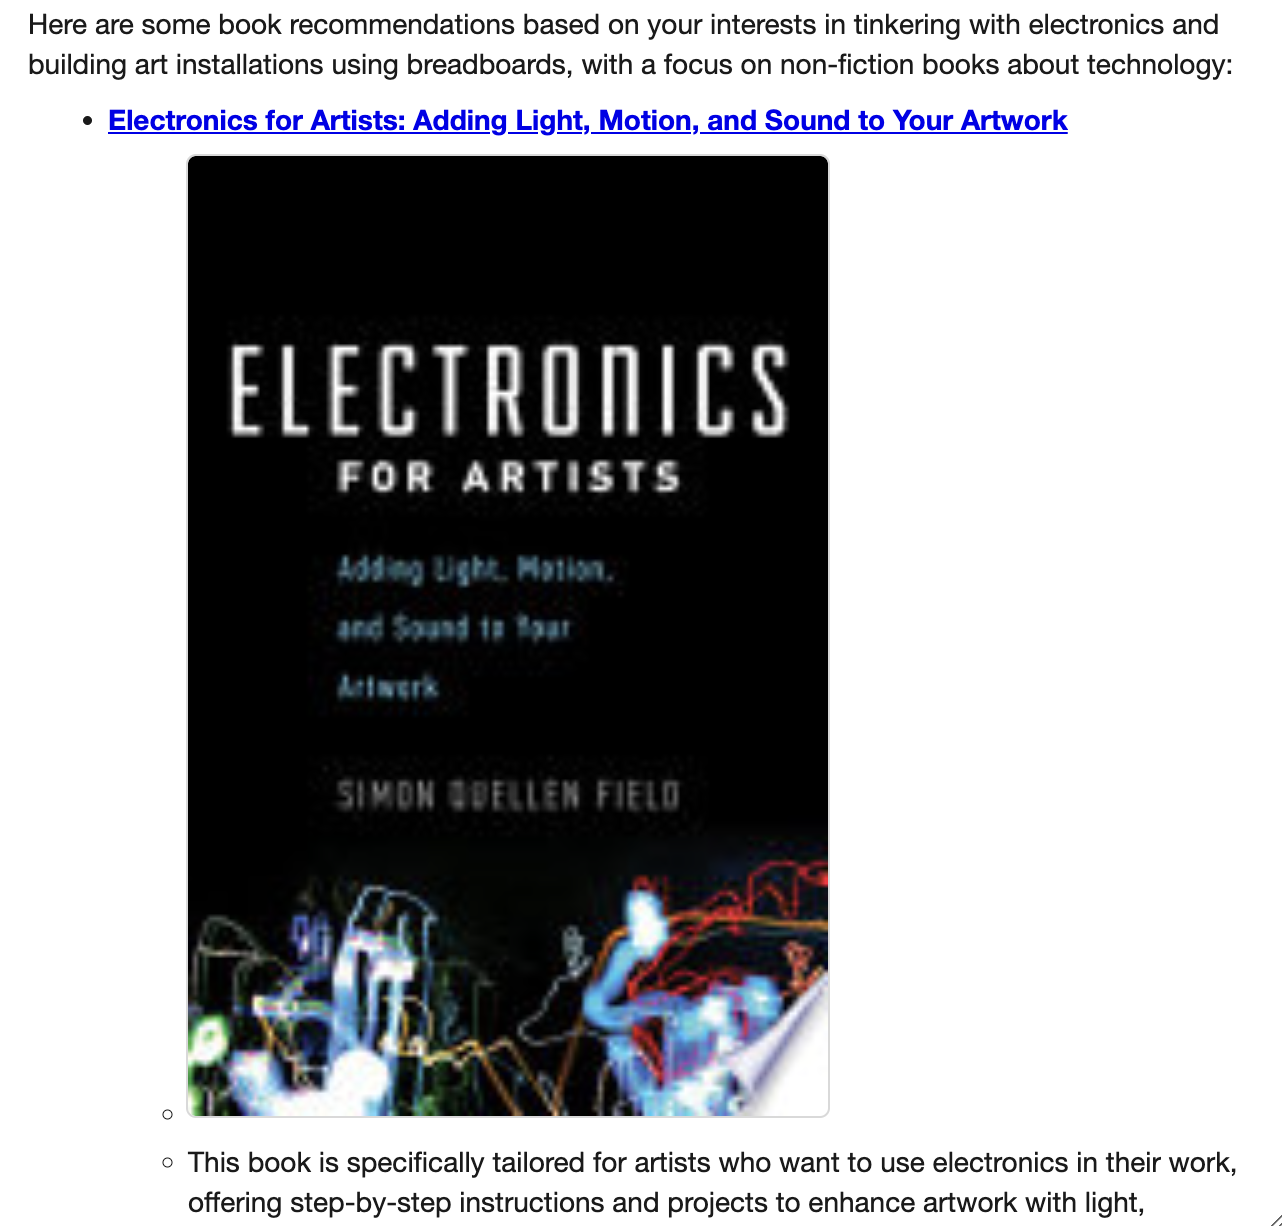
Pretty cool, right?!
As a final touch, let's add comments. Comments are components that don't do anything: they are just there to display text on the board. When playing with boards, they can be quite useful to both explain what happens on the board for others -- and for future selves.
After all the comments have been added and emoji carefully selected, here's our final board:
Congrats! We've just built a Librarian. Here's what we've learned:
-
How to place components (like Specialist, Looper, Comments, etc.) on the board
-
How to give Specialist its purpose
-
How to create interesting repeating patterns with Looper
-
How to tweak and adjust the board over time, teaching it to be more and more useful.
Armed with all this knowledge, it's time to play with Breadboard. The Librarian is just one board. Can you take the Librarian and remix it? Turn it into something different? Use Breadboard Visual Editor as your canvas. Let your creativity roam free on it 💖.