Breadboard From Scratch
This guide is targeted at a developer who wants to deploy their own Breadboard instance with no previous setup or configuration. It will cover all components and all current features.
Note
Writing this document is part of an effort to document and improve this workflow. Expect this process to change over time.
Prerequisites: Required software
This guide assumes that the reader has the following software installed in their local environment.
- Git
- Node (v20.14.0 or higher)
- npm
- Google Cloud CLI
Part 1: Google Cloud setup
Note
These instructions assume that the reader has a normal consumer (gmail.com) Google account. They will detail how to set up a new Google Cloud project. If you are using an existing Cloud project, or are a Workspace user, some of these steps may be different or may not apply. For Workspace users, some steps may require administrator privileges.
Create a new Google Cloud project
Log in to the gcloud CLI. Opens a browser on your local machine to complete the authentication flow.
gcloud auth loginCreate a project ID for your new Google Cloud project (if you're not using an existing project).
PROJECT_ID="YOUR-PROJECT-ID"Tip
Google Cloud project IDs must be unique. You will get an error message when creating a project if the ID you are trying to use is already in use by another project.
Create a new Google Cloud project.
gcloud projects create ${PROJECT_ID}Tip
If you get the message "Callers must accept Terms of Service", visit the Google Cloud Console to accept the terms.
Once the project is created, set it as the default project.
gcloud config set project ${PROJECT_ID}All future commands will now reference this project by default.
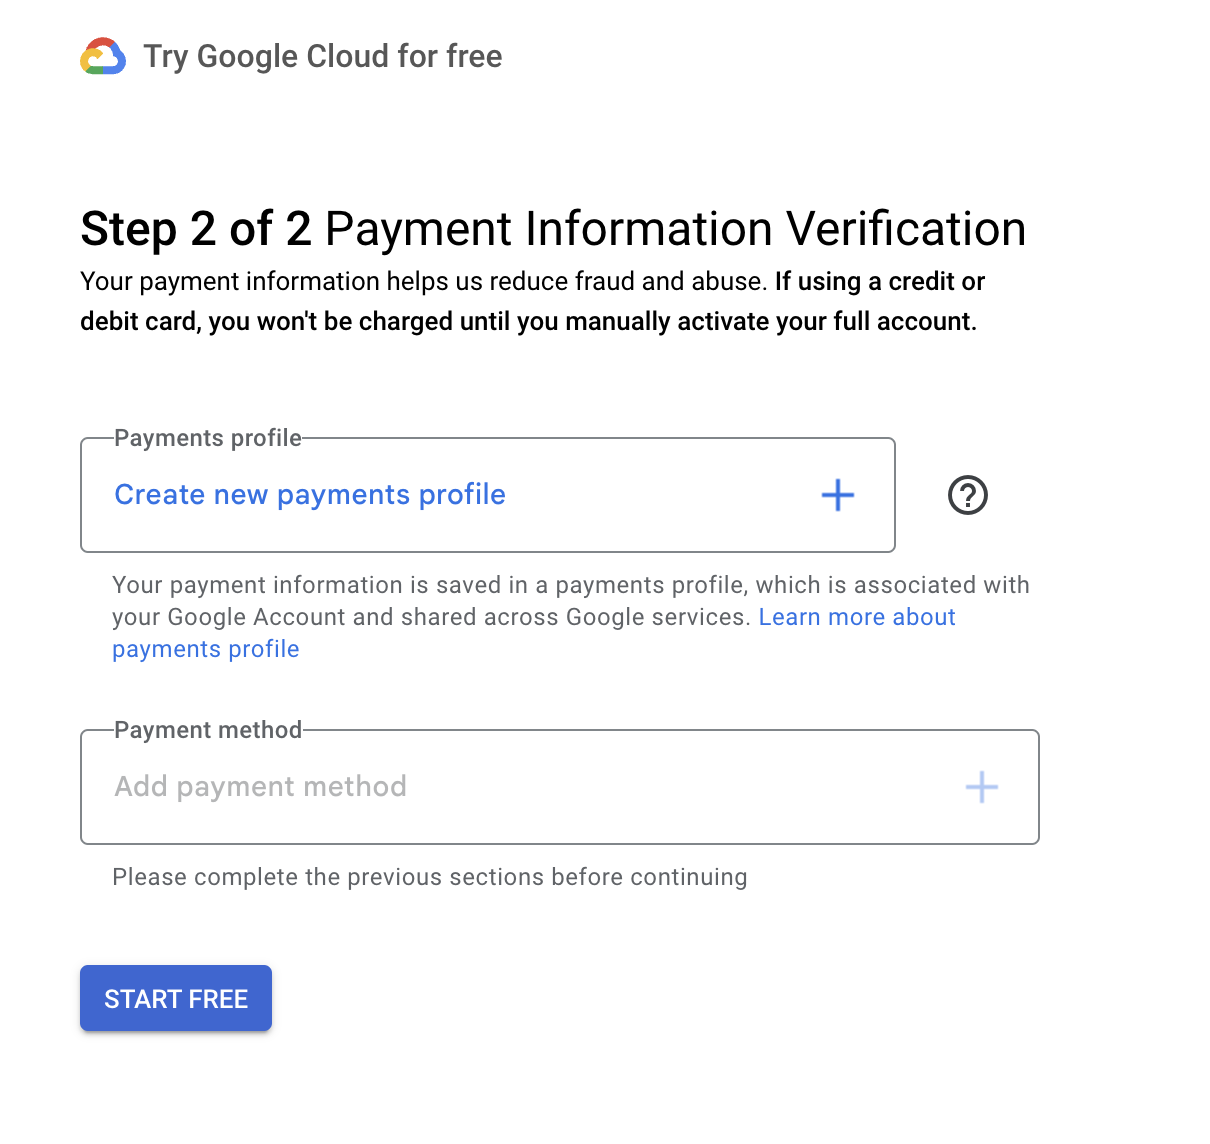
Enable App Engine and Cloud Billing
App Engine requires a billing account. This section will walk you through the steps, assuming that no previous setup has been performed. See this help center article for more information.
- Visit Google Cloud Console to add billing account to your cloud project
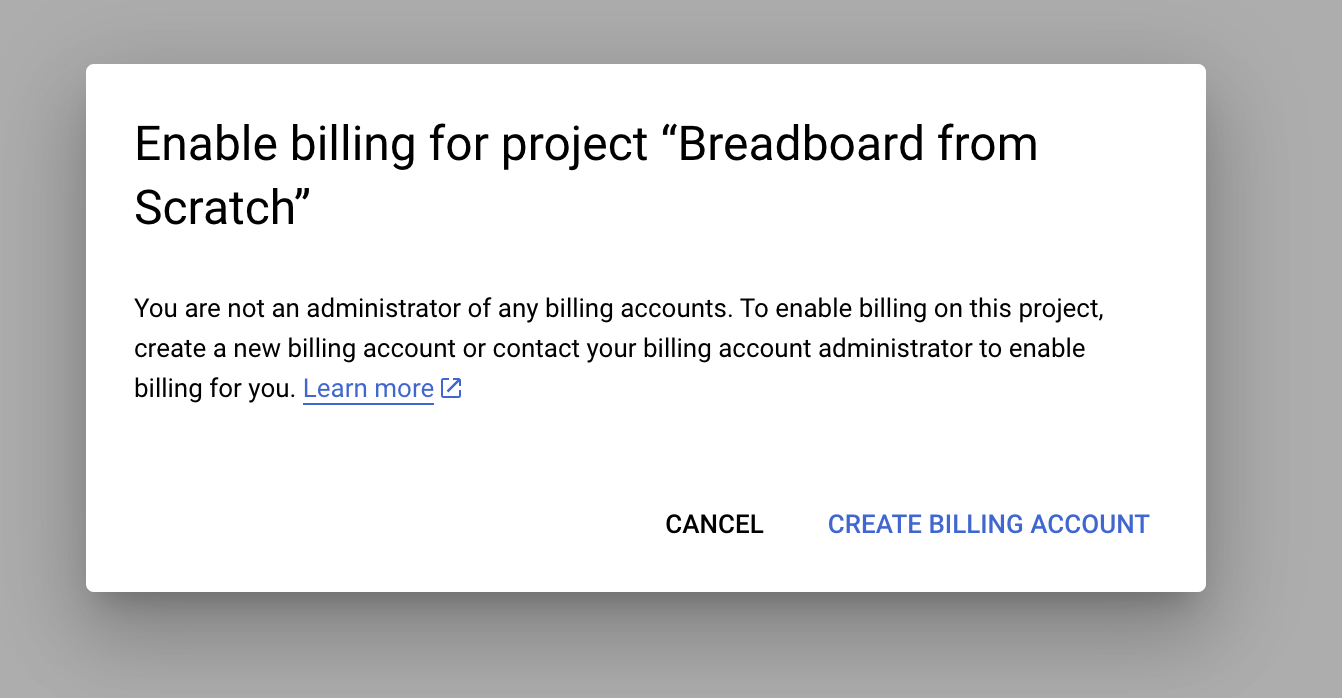
- Select your country and agree to the terms of service
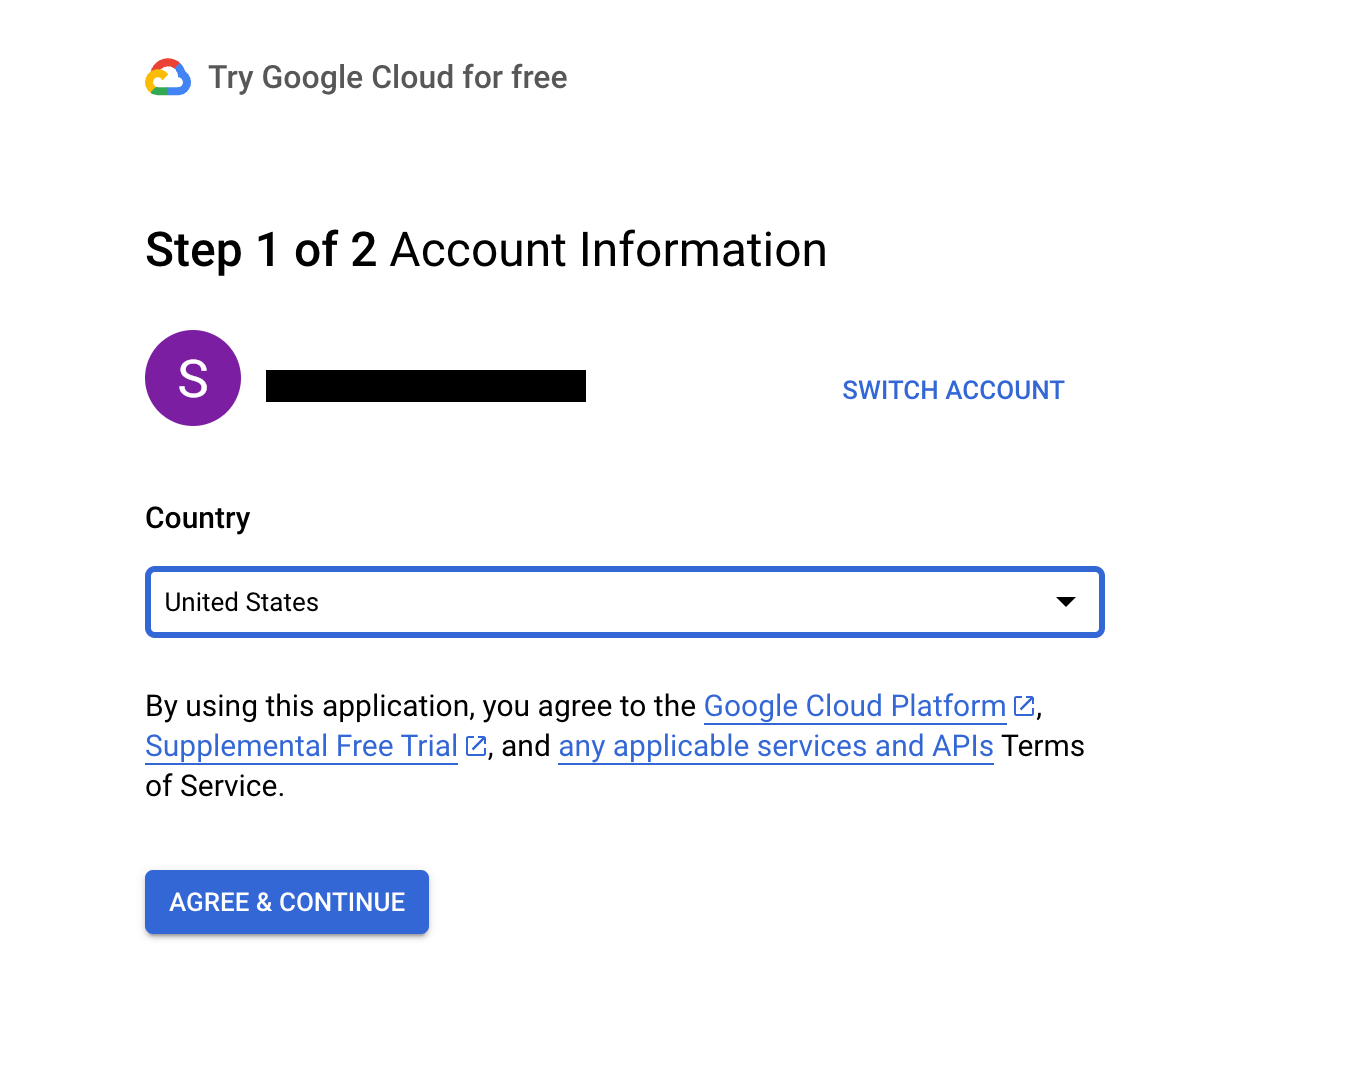
- Enter payment information
Create the App Engine application
Run the following command to create an App Engine application.
gcloud app createThis will interactively walk through the process of selecting a region to which to deploy your application, plus other setup options. For more information and additional options, see the SDK documentation.
Configure the App Engine service account
App Engine requires the default service account to possess both the Editor and Storage Admin roles to successfully deploy applications. As of May 2024, it is no longer possible for App Engine to make this change automatically. It will need to be done manually.
Note
If you are using an established project, or have already configured a service account, this step may not be necessary. See the troubleshooting guide for more information.
gcloud projects add-iam-policy-binding ${PROJECT_ID} --member=serviceAccount:${PROJECT_ID}@appspot.gserviceaccount.com --role=roles/editorgcloud projects add-iam-policy-binding ${PROJECT_ID} --member=serviceAccount:${PROJECT_ID}@appspot.gserviceaccount.com --role=roles/storage.adminPart 2: Deploying the servers
Breadboard is composed of three separate servers: the Visual Editor, the Connection Server, and the Board Server.
Create a local copy of the repo
You will need a local clone of the Breadboard Git repo.
git clone https://github.com/breadboard-ai/breadboardcd breadboardInstall dependencies and build.
npm clean-installnpm run buildThese steps should complete without error. If you encounter any issues, please feel free to get in touch with the team on Discord.
Deploy the Visual Editor
From the root of the repository.
cd packages/visual-editorgcloud app deployThis will deploy the Visual Editor as the default App Engine application. You should now be able to access and use the Visual Editor at the URL given in the console output. You can also see the deployed service on the App Engine dashboard.
Deploy the Connection Server
The Connection Server is responsible for hosting client secrets and creating access tokens for boards running in the Visual Editor. See the README for more information.
Create a secrets file
Create a new JSON file called packages/connection-server/secrets/secrets.json:
{
  "connections": []
}
By default, our server will host no secrets. We will come back and add secrets in Part 2.
Update app.yaml
Update packages/connection-server/app.yaml to add the
origin of
your Visual Editor. This will configure the CORS headers so that your Visual
Editor can successfully connect to the Connection Server.
ALLOWED_ORIGINS: "{YOUR_VISUAL_EDITOR_ORIGIN}"Multiple origins can be separated by spaces. Requests from origins not in this list will be rejected.
Deploy the server
From the repository root:
cd packages/connection-servergcloud app deployYour Connection Server is now deployed to an App Engine service called
connections.
However, it does not have any connections configuered, and your Visual Editor is not yet configured to call it. We will set up this configuration in Part 2.
Deploy the Board Server
Create a Firestore database
Board Server depends on Cloud Firestore for its storage backend.
You will need to select a location for your database. See the help center for available locations and for more information.
Choose an appropriate location:
LOCATION="your-selected-location"Create a Firestore database called board-server:
gcloud firestore databases create --location=${LOCATION} --database=board-serverIf you have not already enabled the Firestore API in your Cloud project, you will be prompted to do so.
Add user(s)
Each user who wishes to connect to a Board Server is identified by an API key.
These keys are created by an admin with write access to the board-server DB.
Acquire application-default credentials:
gcloud auth application-default loginFrom the repository root:
cd packages/board-servernpm run add ${USERNAME}This will run the user creation script and output the API key. The API key can
also be read from the Firestore database under /users/{USERNAME}/apiKey. The
API key will be used later when adding a provider in the Visual Editor.
Update app.yaml
By default, the Board Server is deployed as the default App Engine service. Since we have deployed the Visual Editor as the default service, we want to specify an explicit service name.
Also, we need to configure this Board Server instance to accept requests from our Visual Editor.
- Open
packages/board-server/app.yamlin a text editor. - Set an explicit service name
service: boards
# ... rest of configDeploy the server
From the repository root
cd packages/board-servernpm run deployThis will deploy the service to App Engine. You can see details of the running service in the App Engine console
Part 3: Tying it all together
So far we have deployed each server as a separate, standalone entity. Further configuration is required to enable the Visual Editor to make use of the Connection and Board Servers.
Add a Board Server provider
The Visual Editor can be configured to connect a number of different providers. The default provider stores boards in local browser storage. You can also add a Board Server as a provider. This allows sharing of boards between users and devices.
In your Visual Editor:
- Open the Breadboard menu by clicking on the three lines in the top-left corner
- In the Providers menu, click Add new provider
- Create a new Board Server provider by entering the URL of your board server, and your API key. (The API key can be found in the users collection in the Cloud Console.)
You can now create new boards on the board server, and access boards created by yourself and other users.
Add an API connection
The Visual Editor is a static frontend application. It has no built-in concept of identity or access control. Instead, it can be configured to use a Connection Server to provide it with access tokens that can be used to access remote APIs.
In this section, we will walk through this process using the Google Drive API as an example.
Connect the Visual Editor to the Connection Server
The Visual Editor chooses a Connection Server based on a environment variable. You will need to set this value to your connection server URL.
Open
packages/visual-editor/.env.production
in a text editor.
Update the value of VITE_CONNECTION_SERVER_URL:
VITE_CONNECTION_SERVER_URL={YOUR_CONNECTION_SERVER}Re-deploy the Visual Editor.
cd packages/visual-editornpm run buildgcloud app deployAdd an API connection to the Connection Server
Your Visual Editor is now configured to store boards on a Board Server, and to read connections from a Connection Server. However, our Connection Server is still not hosting any credentials. In this final step, we will add the ability for the Connection Server to serve access tokens for the Google Drive API.
Note
This guide will not provide an in-depth explanation of how OAuth and access tokens work. For more information, see the README for Connection Server.
Enable the Drive API
gcloud services enable drive.googleapis.comConfigure the OAuth consent screen
The OAuth consent screen is the dialog that users see when they are asked to authorize your application to access Drive on their behalf. By consenting, the user grants your Cloud project permission to read their Drive files.
-
Go to the OAuth consent screen in the Google Cloud console
-
Select the External user type
- If you are a Workspace user who only wants other members of your organization to use your application, you may select the Internal user type
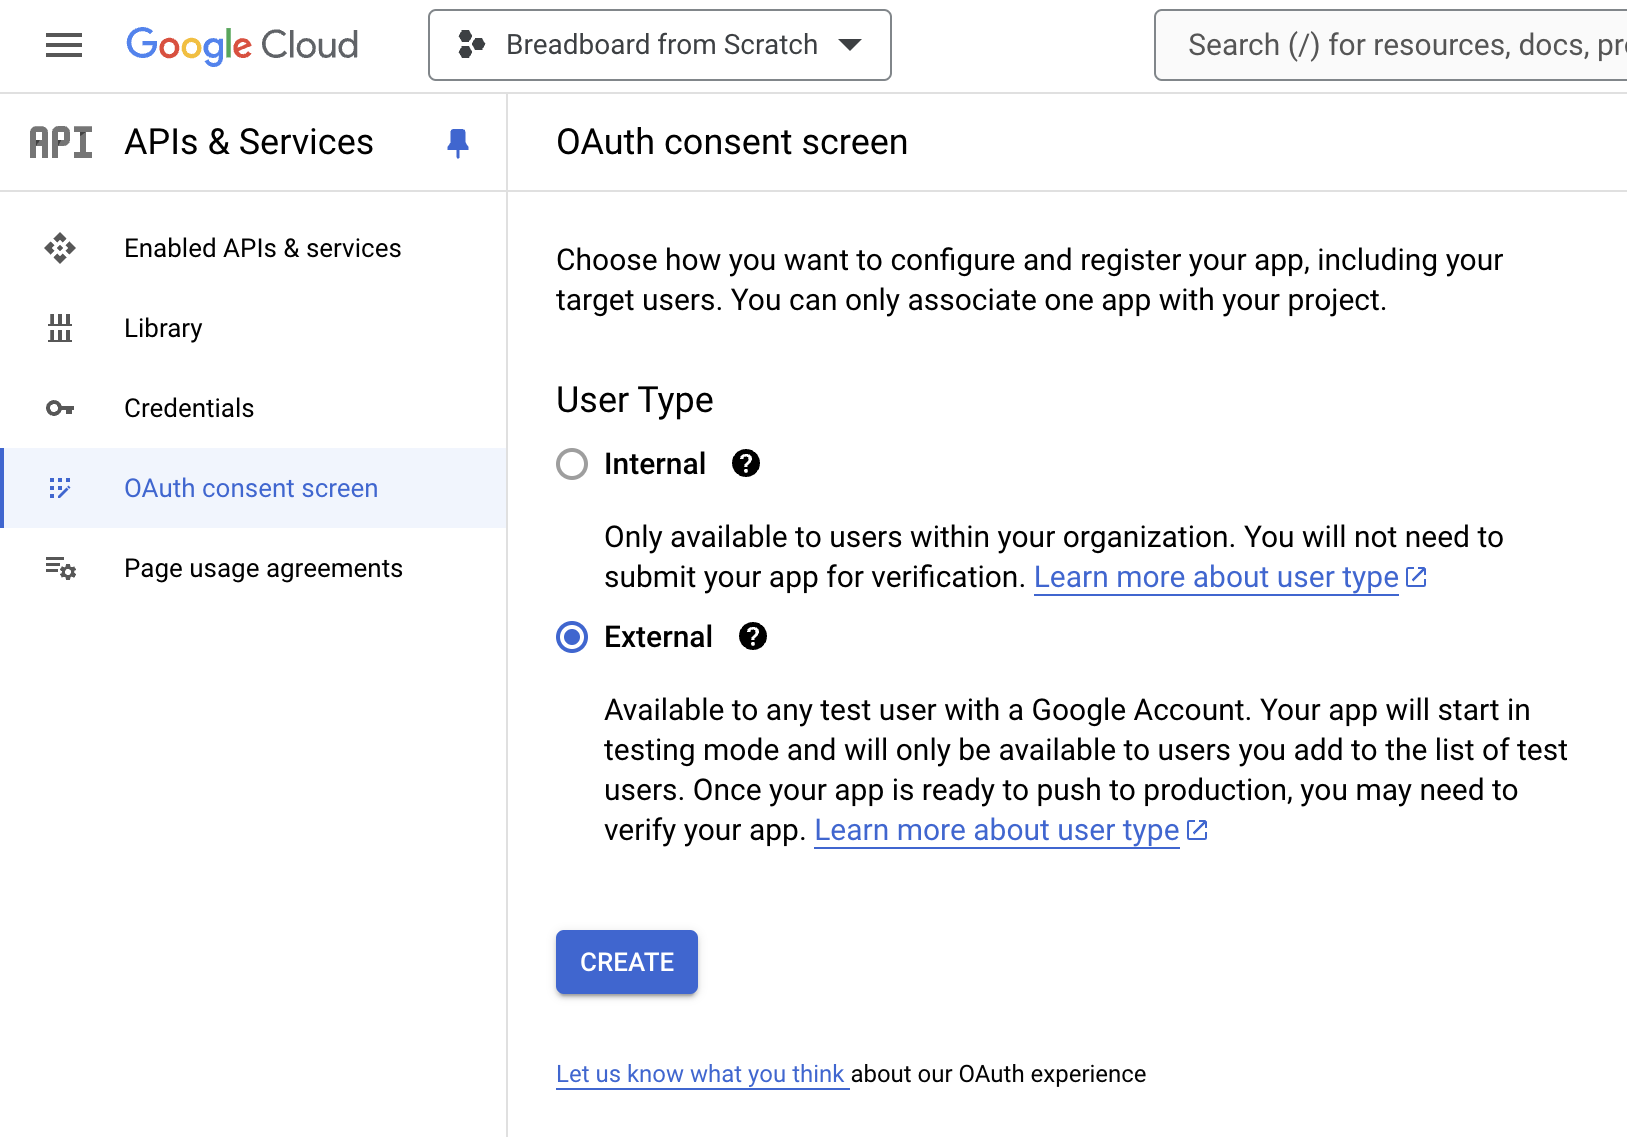
-
Provide App name, User support email, and Developer contact information.
- Other fields may be skipped for now.

-
For Authorized Domains, provide the domain of your Visual Editor instance
- The value of this field must match the domain of your Visual Editor, or your users will not be able to complete the authorization flow.
-
Click Save and Continue
-
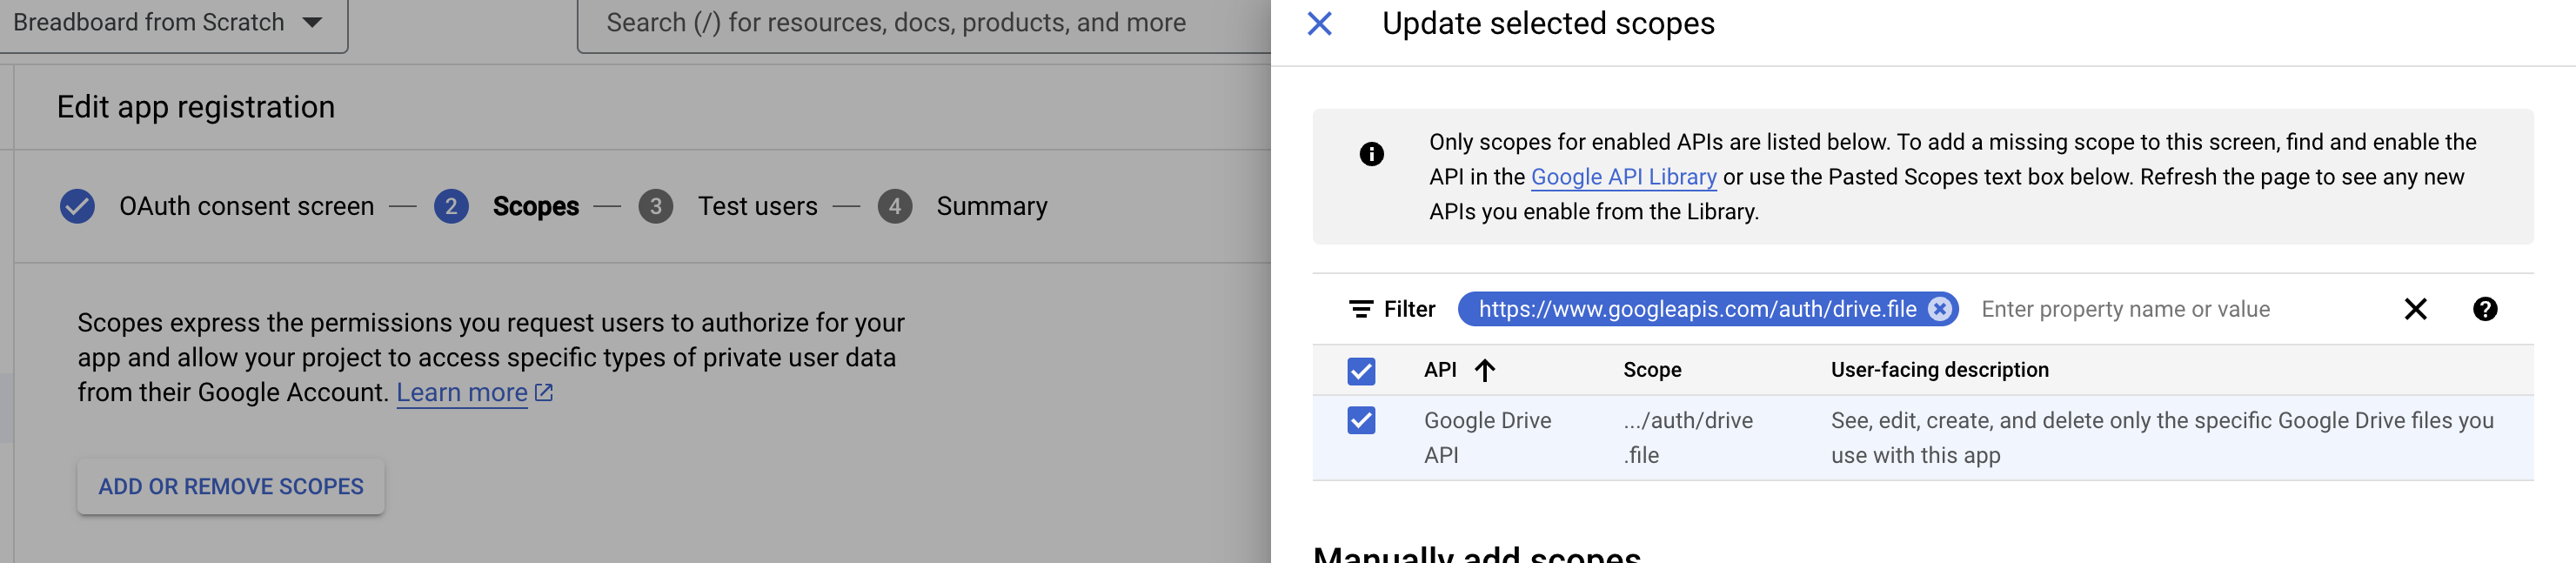
On the Scopes page, click ADD OR REMOVE SCOPES and add the
drive.filescope- The full name of the scope is
https://www.googleapis.com/auth/drive.file - This permission allows your application to create new files, to access created files, and to access files that the user explicitly selects in the Drive picker dialog.
- This is a much less permissive scope than the full
drivescope, which gives the application complete, unrestricted access to the user's Drive.
- The full name of the scope is
-
Add the users that you want to authorize to use your application.
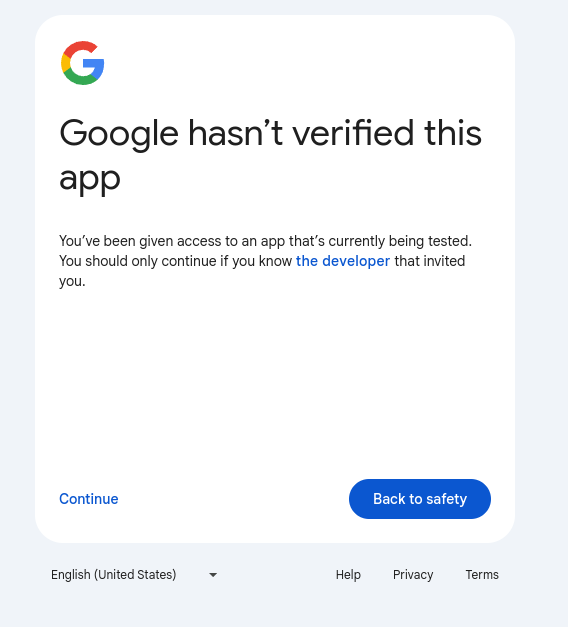
- All applications begin in "Testing" mode. Access to your application is restricted to specific test users while in testing mode, and users will see a warning screen when authorizing the application.
- To open your application to all users, you will need to complete the app verification process

Create an OAuth credential
- Go to Credentials in Google Cloud console
- Click CREATE CREDENTIALS > OAuth Client ID
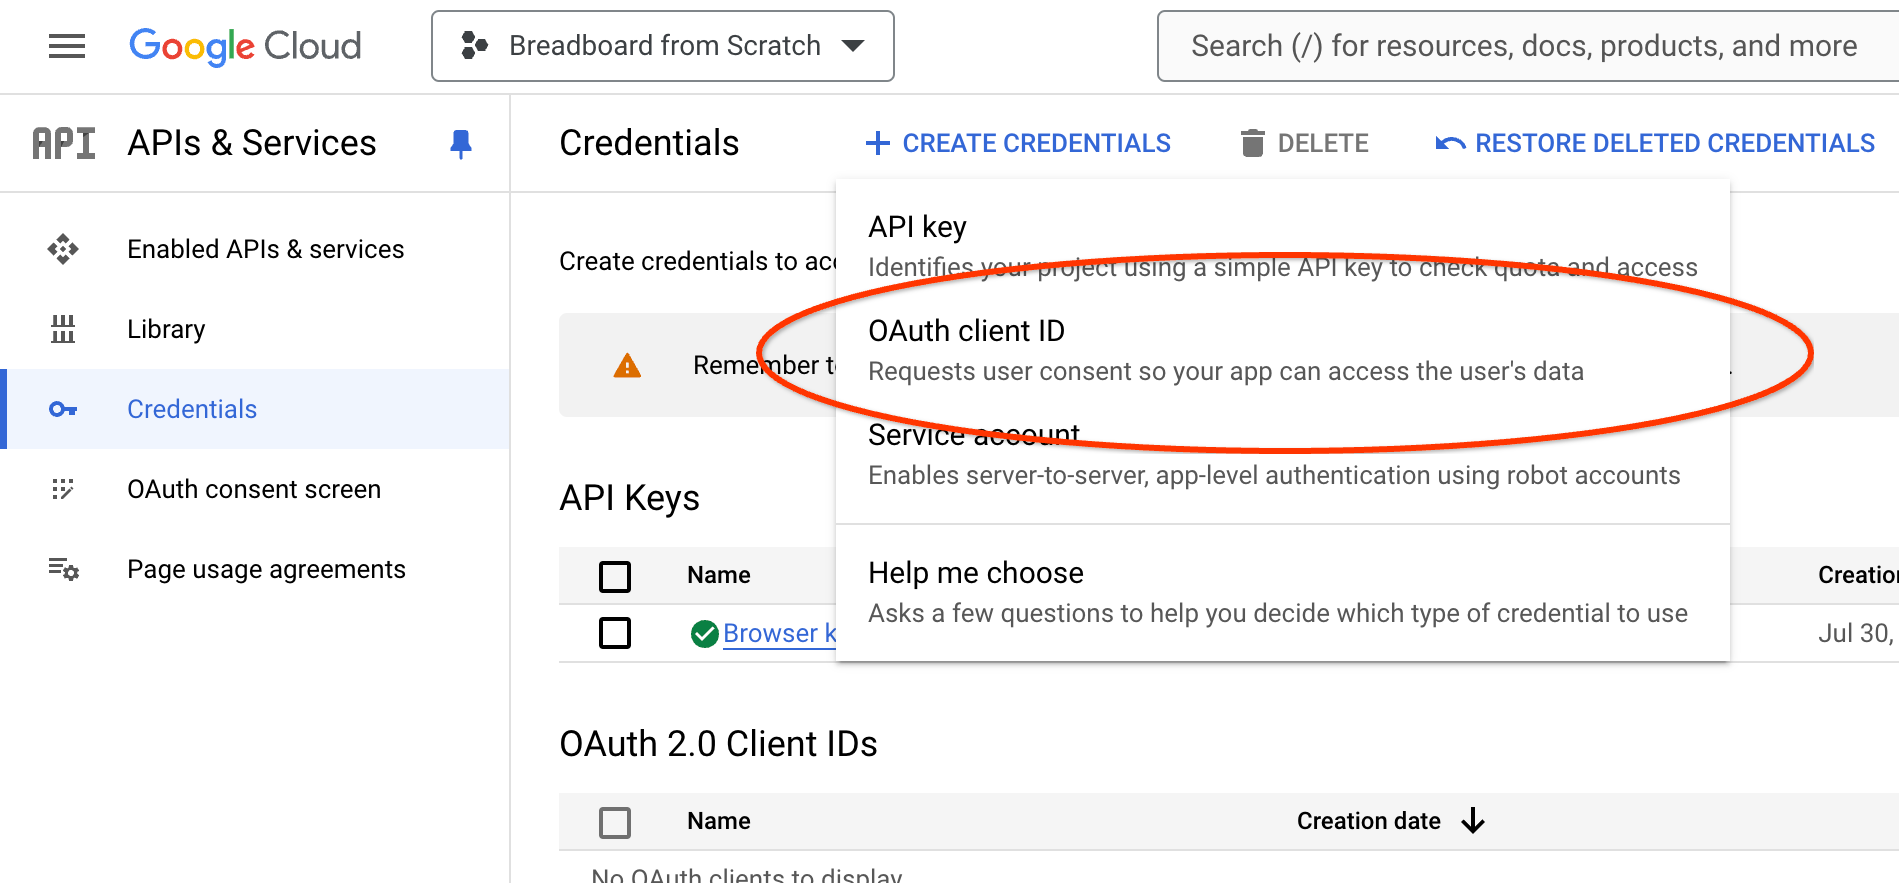
-
Set the Application type to Web application
-
Give the credential a name.
- This is an internal identifier that is not shown to end users
- End users will see the name provided in the previous step when they are asked to authorize the application
-
Add an Authorized JavaScript origin and provide the origin for your Visual Editor instance
-
Add an Authorized redirect URI and provide your Visual Editor origin plus
/oauth/.- For example, if your visual editor is deployed at
https://example.appspot.comthen the redirect URI would behttps://example.appspot.com/oauth/ - Be sure not to omit the trailing slash. The authorization request will fail without it.
- For example, if your visual editor is deployed at
-
Click CREATE to finish creating the credential

Warning
You will be shown a confirmation dialog with details of your new credential, including a client secret value. This client secret is highly sensitive. Do not store it where anyone else will have access to it. Especially do not check it into any version control system. There is no need to write this value down. You can always access it later in Cloud Console.
Add the credential to the Connections Server
- Go to Credentials in Google Cloud console
- Find your OAuth client ID and click Download OAuth client

- Download the JSON file to your local filesystem
Warning
The downloaded client secret has sensitive data that can be used to impersonate your application to Google's APIs. Ensure that no unauthorized users have access to it. You can delete the file once you are done with this step.
- Edit
packages/connection-server/secrets/secrets.jsonto add a connection to Google Drive. You will need to provide the"client_id","client_secret","auth_uri", and"token_uri"values from your downloaded client secret.
{
  "connections": [
    {
      "id": "google-drive-limited",
      "title": "Google Drive",
      "description": "Read & write only the files in your Google Drive that you have shared with Breadboard.",
      "oauth": {
        "client_id": "{YOUR_CLIENT_ID}",
        "client_secret": "{YOUR_CLIENT_SECRET}",
        "auth_uri": "https://accounts.google.com/o/oauth2/auth",
        "token_uri": "https://oauth2.googleapis.com/token",
        "scopes": ["https://www.googleapis.com/auth/drive.file"]
      }
    }
  ]
}
Note
The ID must be "google-drive-limited". This value is hard coded into the
Google Drive component. The title and description can be whatever you like.
These values will be shown in the Visual Editor UI.
- Redeploy the Connection Server
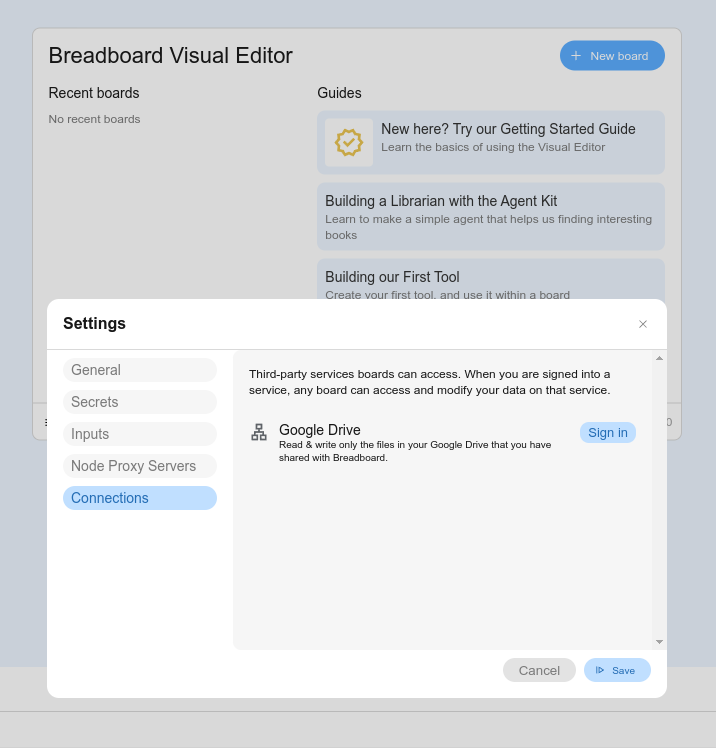
cd packages/connection-servergcloud app deployYour Connection Server is now configured to serve access tokens for the Google Drive API. You can see the configured connection (and sign in to the Drive API) in the Settings > Connections menu in the Visual Editor.

APPENDIX: Deploying the Visual Editor on Firebase hosting
Note
This is an alternative option for deploying the Visual Editor. The Visual Editor is a static site, so it can be served from any service that supports serving static files. The process would be largely similar on any other static hosting service.
These instructions require the Firebase CLI.
Enable Firebase
If you don't have a project already:
- Navigate to (Firebase Console)[https://console.firebase.google.com/] and click "Create a project" or "Add Firebase to a Google Cloud project"
Set up the Firebase CLI
Log in to Firebase on your local machine. This will open a browser window that will take you through the authentication process.
firebase loginYou should now be able to use the firebase command to access your Firebase
projects. You can test this by using the projects:list command.
firebase projects:list
✔ Preparing the list of your Firebase projects
┌──────────────────────┬──────────────────┬────────────────┬──────────────────────┐
│ Project Display Name │ Project ID       │ Project Number │ Resource Location ID │
├──────────────────────┼──────────────────┼────────────────┼──────────────────────┤
│ Your Project Name    │ your-project-id  │ 12345671234    │ [Not specified]      │
└──────────────────────┴──────────────────┴────────────────┴──────────────────────┘

1 project(s) total.
Note
If you have recently created your Firebase project, there may be a small
propagation delay before it appears in the projects:list result. You should
make sure it does before continuing.
Set your project as the current project.
firebase use --add your-project-idDeploy to Firebase hosting
Build the visual editor and deploy to Firebase:
cd packages/visual-editornpm run buildfirebase deployThat's it! By default, Firebase will deploy your site to a custom domain under
web.app and/or firebaseapp.com. You can see the exact URL in your
console. You should now be able to see
and use the Breadboard Visual Editor at this URL.